YOLO-World is one of the most exciting computer vision models available today. Unlike traditional object detectors that are limited to predefined classes, YOLO-World allows you to define your own objects using simple text prompts.
Want to detect a robot, coffee mug, screwdriver, keyboard, or almost any other common object? Simply tell YOLO-World what you’re looking for and start detecting.
Even better, when combined with Ultralytics’ streaming mode, you can create a real-time object detector in just a few lines of Python code.
Prerequisites
This tutorial assumes you already have:
- A Raspberry Pi 5
- A USB camera or PI camera
- A Python virtual environment
- Ultralytics installed
- OpenCV installed
If you need help with any of these steps, check out our previous CraftyRobotics tutorials:
- Creating Python Virtual Environments on Raspberry Pi
- Installing Ultralytics on Raspberry Pi
- Supercharge YOLO on Raspberry Pi 5 with NCNN
Once your environment is ready, activate your virtual environment and continue with this tutorial.
What is YOLO-World?
Traditional YOLO models can only detect the classes they were trained on. If you want to detect a new object, you typically need to collect images and train a custom model.
YOLO-World works differently.
Instead of training a custom dataset, you simply provide text descriptions of the objects you want to detect. The model then searches for those objects in real time.
This makes YOLO-World especially useful for:
- Robotics
- Automation
- Inventory systems
- Agricultural applications
- Smart home projects
- Rapid AI prototyping
Step 1 – Create a New Python Script.
For this tutorial we will be looking for a yellow ball. The streaming mode allows very few lines of code to be used for very advanced applications.
from ultralytics import YOLOWorld

# Load YOLO-World model
model = YOLOWorld("yolov8s-world.pt")

# Set custom detection classes
model.set_classes([
    "yellow ball"
])

# Start streaming from the default camera
results = model.predict(
    source=0,
    stream=True,
    show=True,
    conf=0.65
)

# Process stream
for r in results:
    pass
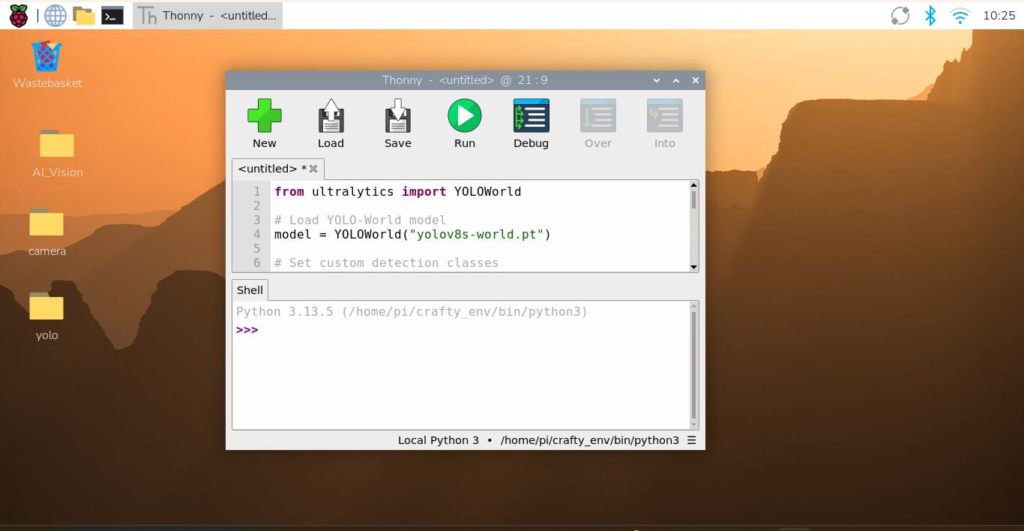
Open the Thonny IDE, copy the code above, and paste it into the main editor window in Thonny..
Step 2 – Save the Code.
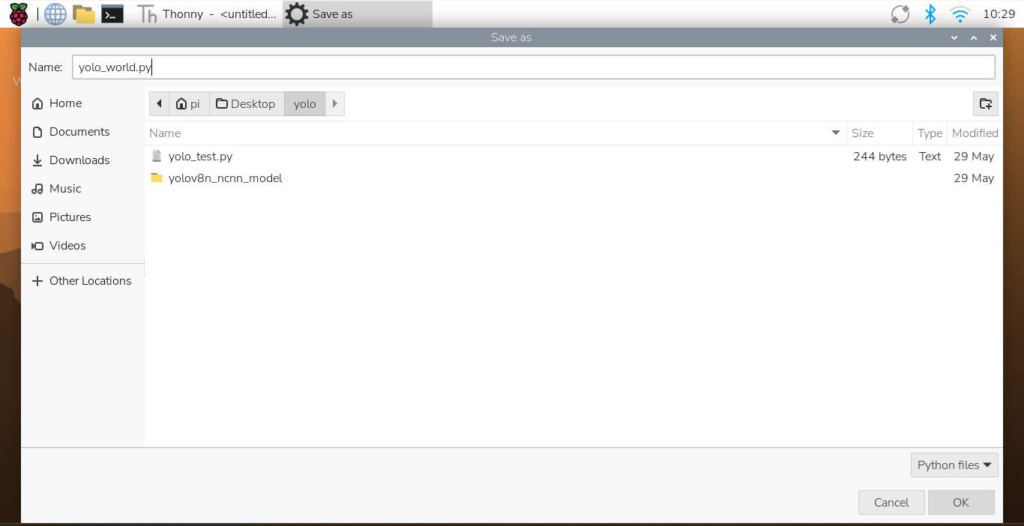
Click Save. We’ll be using the YOLO folder created in an earlier tutorial, but feel free to create a new folder if you want to keep things organized. Click save. Navigate to the yolo folder. Name the file yolo_world.py and click ok.
Step 3 – Run the code.
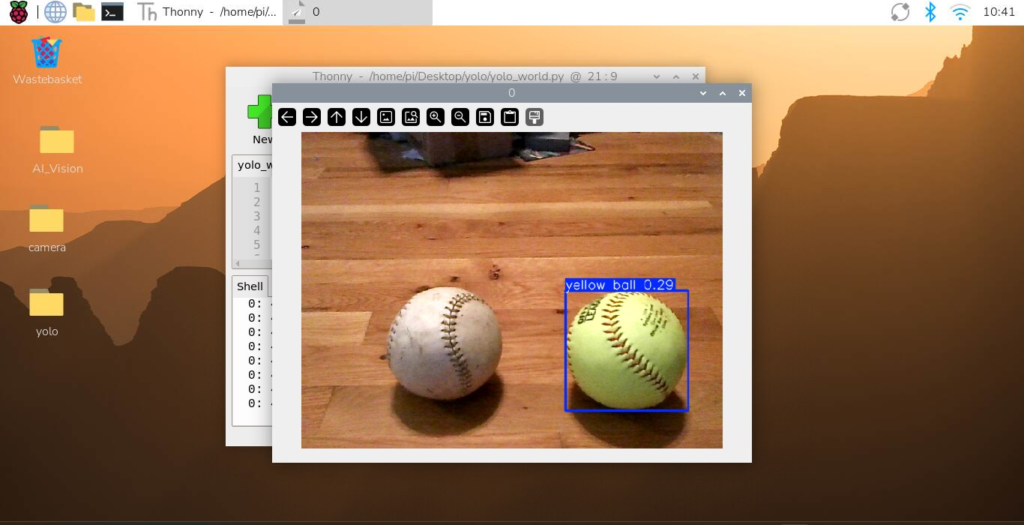
Click Run. The code will first load the model. Once the model has loaded, a window will appear. Move some objects in front of the camera, and the target object will be detected by the program.
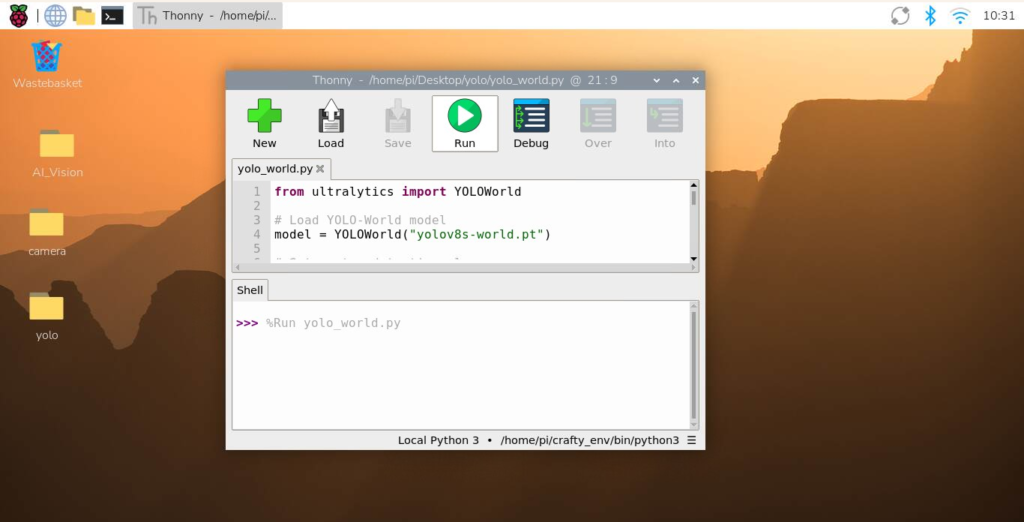
Code description.
This script runs YOLO-World in real time using a USB camera or PI cam on your Raspberry Pi.
First, we import the YOLOWorld model from Ultralytics and load the pre-trained yolov8s-world.pt model. This model supports open-vocabulary detection, meaning we can define what it should look for using text instead of training a dataset.
Next, we set the detection target using:
model.set_classes(["yellow ball"])This tells YOLO-World to search the camera feed for a yellow ball.
The predict() function then starts streaming from the default camera (source=0). Streaming mode processes each frame one at a time in real time, making it efficient for Raspberry Pi applications.
# Start streaming from the default camera
results = model.predict(
    source=0,
    stream=True,
    show=True,
    conf=0.25
)
We also set a confidence threshold of 0.25, which filters out low-confidence detections.
Finally, the loop:
for r in results:
    pass
The loop keeps the stream running continuously while YOLO-World processes each frame and displays the detection results in a live window.
In just a few lines of code, this creates a real-time object detection system capable of finding a yellow ball using only a text prompt instead of a trained dataset.
And that’s it. In just a few lines of code, YOLO-World is now detecting objects in real time using a live camera feed on the Raspberry Pi 5. From here, you can start building more advanced robotics projects like object tracking, autonomous navigation, and smart detection systems.
Control a GPIO pin with YOLO-World.
With only a few extra lines of code you can also turn on and off GPIO pins, in this case and LED. The code is below.
from ultralytics import YOLO
from gpiozero import LED
import time

# -------------------
# GPIO SETUP
# -------------------
led = LED(18)
led.off()

# -------------------
# YOLO SETUP
# -------------------
model = YOLO("yolov8s-world.pt")
model.set_classes(["yellow ball"])

# -------------------
# CAMERA STREAM
# -------------------
results = model.predict(source=0,show=True, stream=True, conf=0.65)

print("Starting detection...")

for r in results:
    detected = False

    if r.boxes is not None:
        for box in r.boxes:
            cls_id = int(box.cls[0])
            name = model.names[cls_id]

            if name == "yellow ball":
                detected = True
                break

    if detected:
        print("Yellow ball detected!")
        led.on()
    else:
        led.off()

    time.sleep(0.01)
The LED portion of this code uses the Raspberry Pi’s GPIO pins to provide a simple visual indicator when the target object is detected. The gpiozero library is imported to simplify GPIO control, and an LED object is created on GPIO pin 18:
led = LED(18)
led.off()
The led.off() command ensures that the LED starts in the OFF state when the program begins.
During each pass through the detection loop, the code checks whether a yellow ball has been found. If a yellow ball is detected, the LED is turned on:
led.on()If no yellow ball is present, the LED is turned off:
led.off()This allows the LED to act as a real-time status indicator, illuminating whenever the Raspberry Pi recognizes the specified object and turning off when the object is no longer detected. The result is a simple way to connect computer vision with physical hardware, enabling the Raspberry Pi to interact with the real world based on what the camera sees.
Hardware hookup.
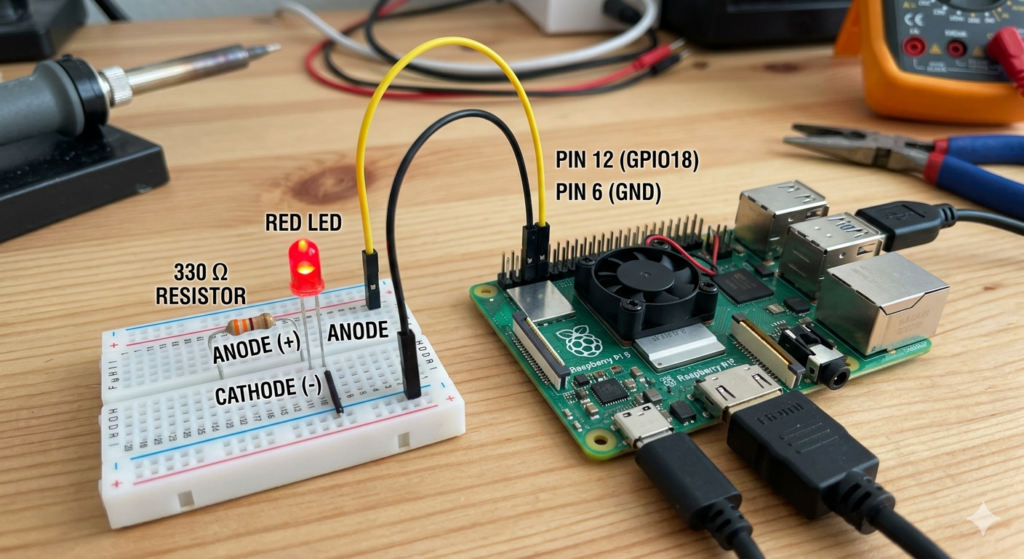
⚠️ Important: Always Use a Resistor When Connecting LEDs to GPIO Pins
When working with Raspberry Pi GPIO pins (such as GPIO18 / Pin 12), you must always include a current-limiting resistor when connecting an LED.
🔌 Correct LED Wiring (Series Circuit)
Connect the components in a single series loop:
GPIO18 (Pin 12) → 330 Ω resistor → LED (anode → cathode) → GND (Pin 6)
💡 LED Polarity
- Anode (+, long leg) → connects toward GPIO/resistor side
- Cathode (−, short leg) → connects to GND
⚡ Why the resistor is required
GPIO pins output 3.3V and very limited current. Without a resistor, the LED can draw too much current, which may:
Check out the video on YouTube!