(Required for All Raspberry Pi Python Projects)
When working with Python on a Raspberry Pi, different projects often require different libraries and versions of software. Installing everything globally can quickly create conflicts and make projects harder to manage.
A Python virtual environment solves this problem by creating an isolated workspace where each project can keep its own packages and dependencies separate from the rest of the system.
In this tutorial, we will create a dedicated Python virtual environment that will be used for all of our Raspberry Pi projects on this website and setup Thonny to use our environment.
Why Use a Virtual Environment?
✔ Prevents package conflicts
✔ Keeps projects isolated
✔ Makes troubleshooting easier
✔ Required for future AI and robotics tutorials
From now on, all CraftyRobotics Raspberry Pi Python projects will use this environment.
Step 1 – Install Virtual Environment Support
Open a terminal on your Raspberry Pi and run:
sudo apt update
sudo apt install python3-venv
This installs the tools needed to create virtual environments.
Step 2 – Create the CraftyRobotics Environment
Now we will create our dedicated environment.
python3 -m venv crafty_envThis creates a folder called crafty_env in your home directory.
Step 3 – Activate the Environment
To turn it on, run:
source crafty_env/bin/activateIf successful, your terminal will now look like this:
(crafty_env) pi@raspberrypi:~ $That (crafty_env) at the beginning means you are inside the virtual environment.
⚠ If you open a new terminal later, you must activate it again using:
source crafty_env/bin/activate
Step 4 – Install Core Packages
We’ll install some common packages used in robotics projects.
pip install numpy
pip install opencv-python
pip install matplotlib

//Later AI tutorials may also include:
pip install torch
After the packages have loaded the virtual environment can be closed by typing deactivate in the terminal.
deactivateStep 5 – Set Thonny to Use the CraftyRobotics Environment
This is the most important step.
If you skip this, Thonny will not use your virtual environment.
We will connect Thonny to the environment you created earlier.
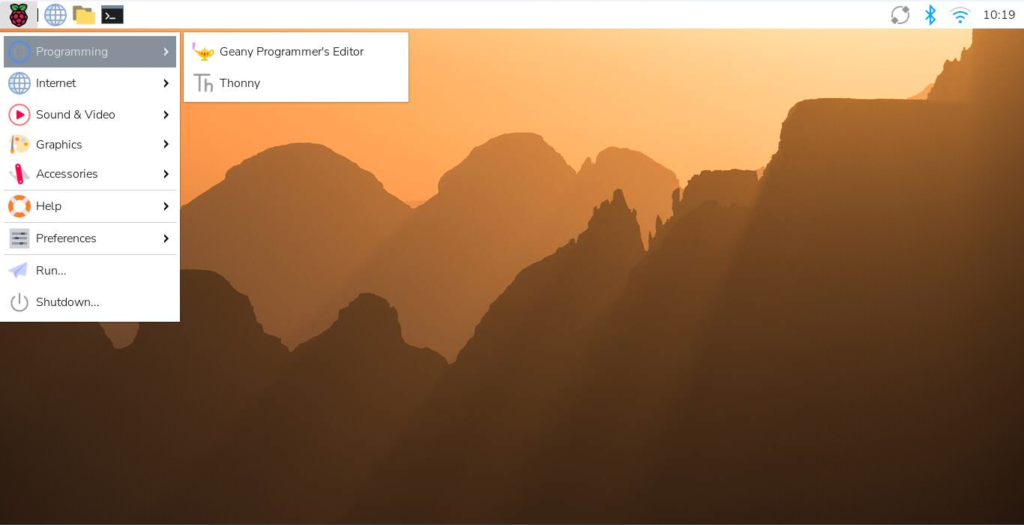
1) Open Thonny
Launch Thonny from the Raspberry Pi menu.
2) Test Thonny Before Connecting the Environment
In the editor window type the following code:
import numpy
import cv2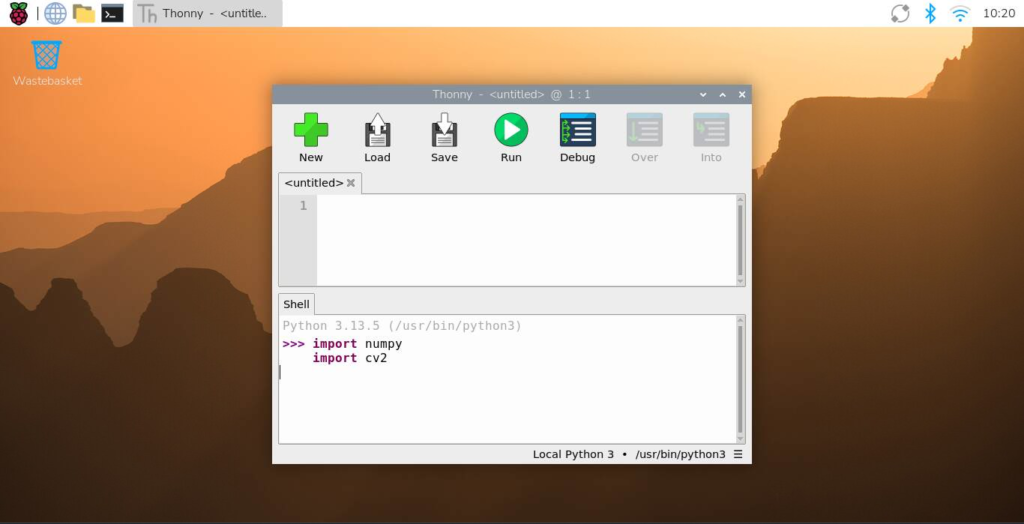
Click Run.
Since the environment is not connected yet, you will probably see an error in the Shell window saying the module cannot be found.
This is normal and expected.
3) Find the Interpreter Selector
Look at the lower-right corner of the Thonny window.
You will see something like:
Python 3 (Raspberry Pi)
This shows which Python interpreter Thonny is currently using.
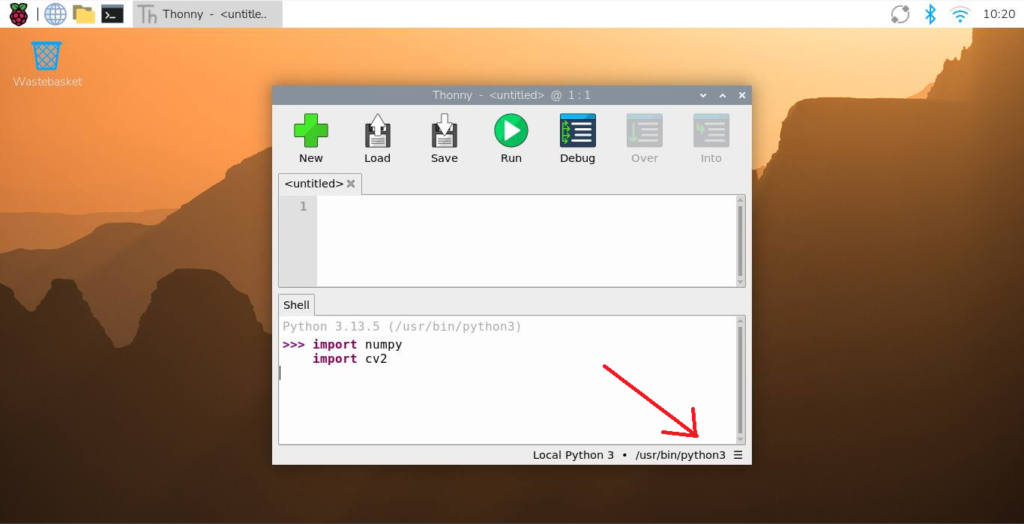
4) Change the Interpreter
Click the Python interpreter name in the lower-right corner.
A menu will appear.
Select:
Select interpreter
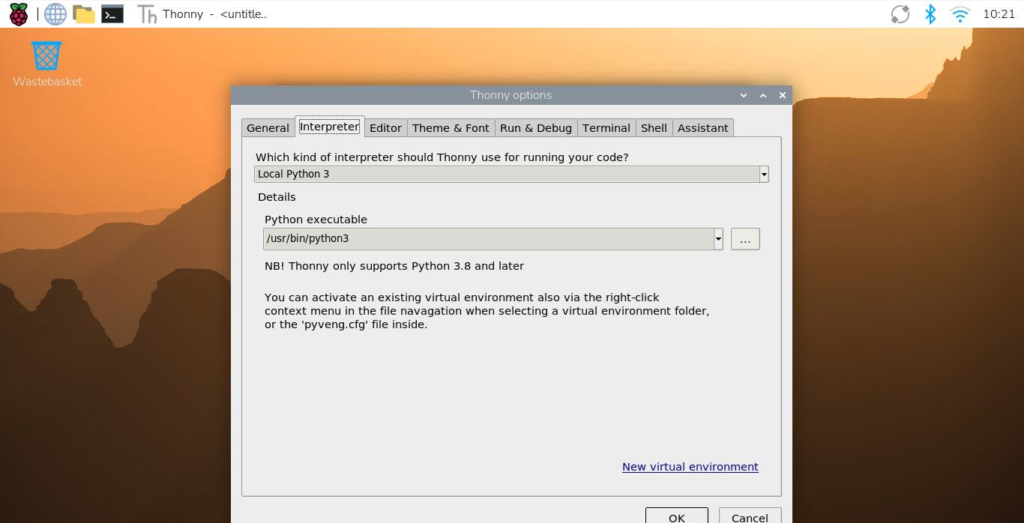
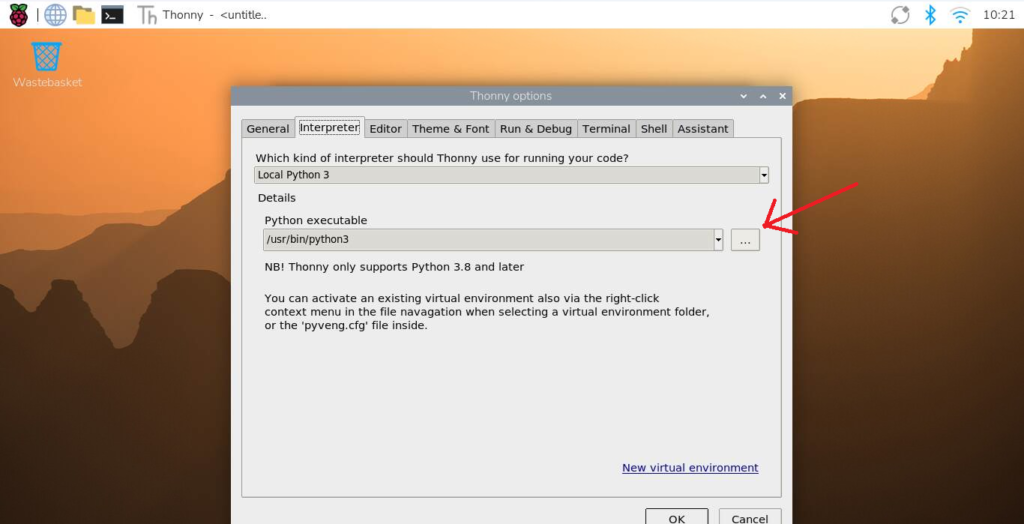
5) Choose a Different Python Interpreter
Select:
Alternative Python 3 interpreter or virtual environment
Then click Browse.
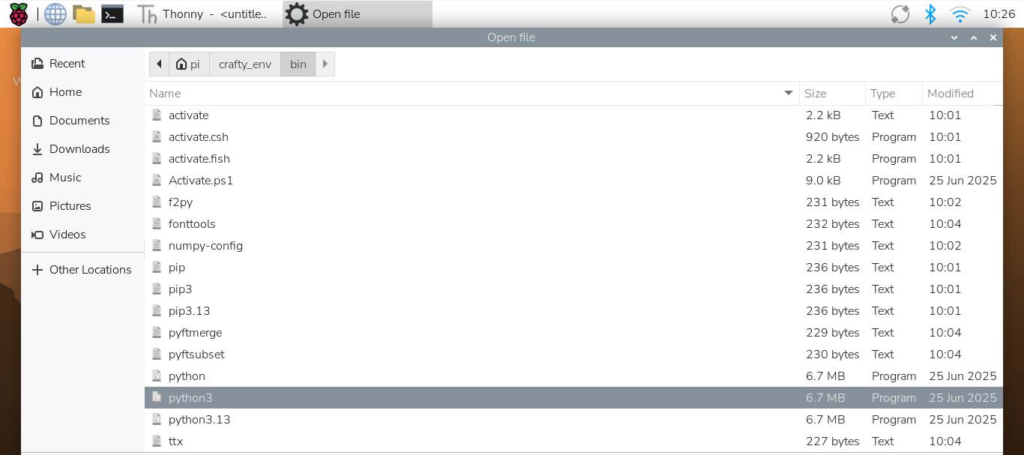
6) Navigate to the CraftyRobotics Environment
Browse to the following location:
/home/pi/crafty_env/bin/python3Select python3.
Click OK.
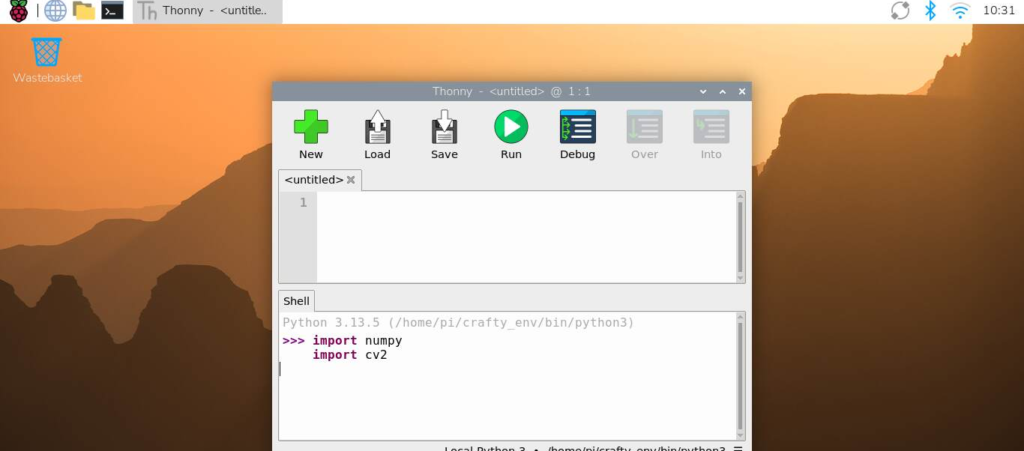
Step 6 – Test the Environment
Run the same test again.
import numpy
import cv2
If no errors appear, everything is working correctly.
From Now On…
All CraftyRobotics Raspberry Pi Python projects will use:
crafty_env
Before starting any tutorial, always check:
✔ The interpreter shown in the bottom-right corner of Thonny
✔ It is pointing to the crafty_env environment
Click below for the video!