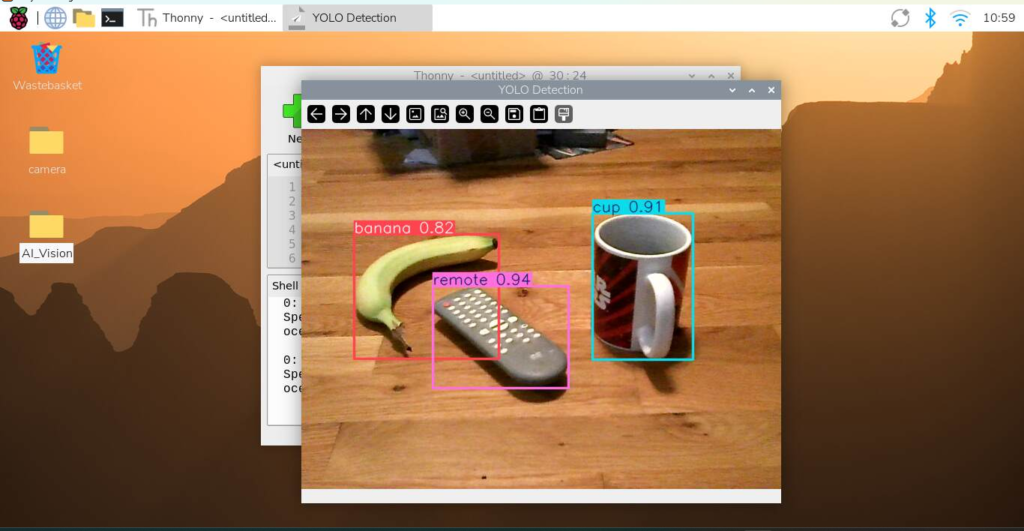
Want to unlock the true potential of computer vision on your Raspberry Pi 5? Standard PyTorch models can cause microcomputers to lag, freeze, or drop frames. In this CraftyRobotics guide, we will walk you through launching a baseline yolov8n model in Thonny, switching safely to the terminal for high-performance compiling, and supercharging your setup by exporting to the ultra-lightweight NCNN format for silky-smooth, real-time live video tracking.
What You Need
- Raspberry Pi 5
- USB Webcam plugged into a blue USB 3.0 port
- A pre-existing python virtual environment (venv) with
ultralyticsandncnninstalled
If you do not already have a Virtual Environment setup follow the CraftyRobotics Tutorial on Virtual Environments. https://craftyrobotics.com/setting-up-a-python-virtual-environment/
If you do not yet haveultralyticsinstalled follow the CraftyRobotics tutorial on YOLO. https://craftyrobotics.com/raspberry-pi-yolo-object-detection-tutorial-beginner-friendly/
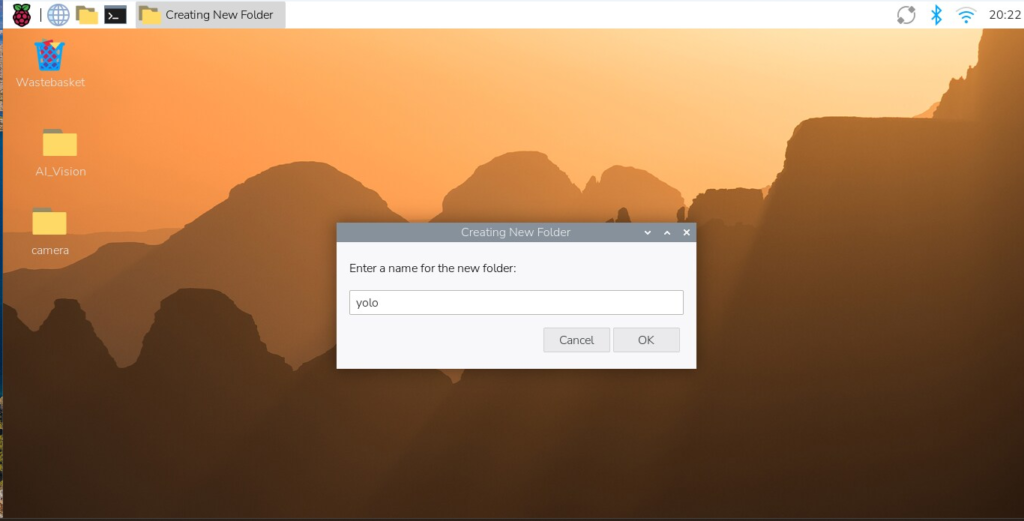
Step 1 — Create a new folder for our program
Click on the desktop, then right-click and select “New Folder”. Name the new folder “YOLO”.
Step 2 — Open Thonny
Launch Thonny from the Raspberry Pi menu.
Step 3 — Check Thonny Interpreter
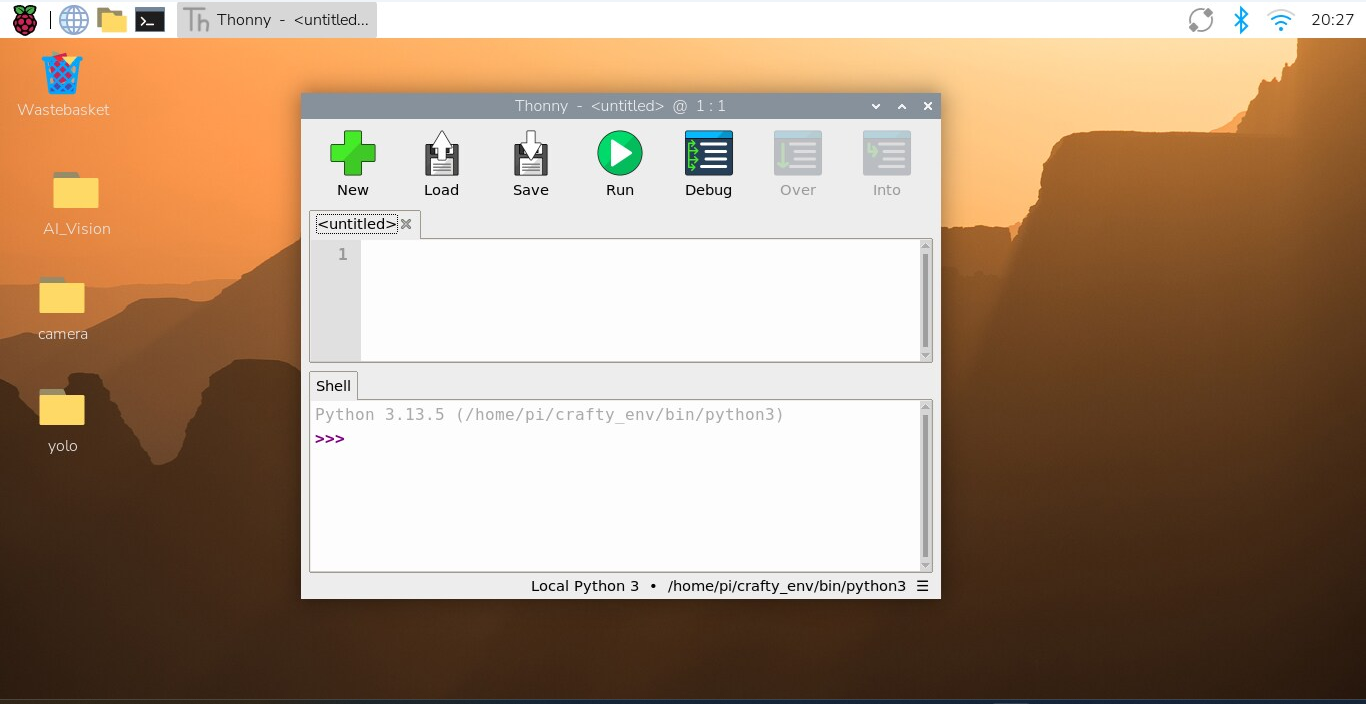
Check to make sure Thonny is connected to the virtual environment.
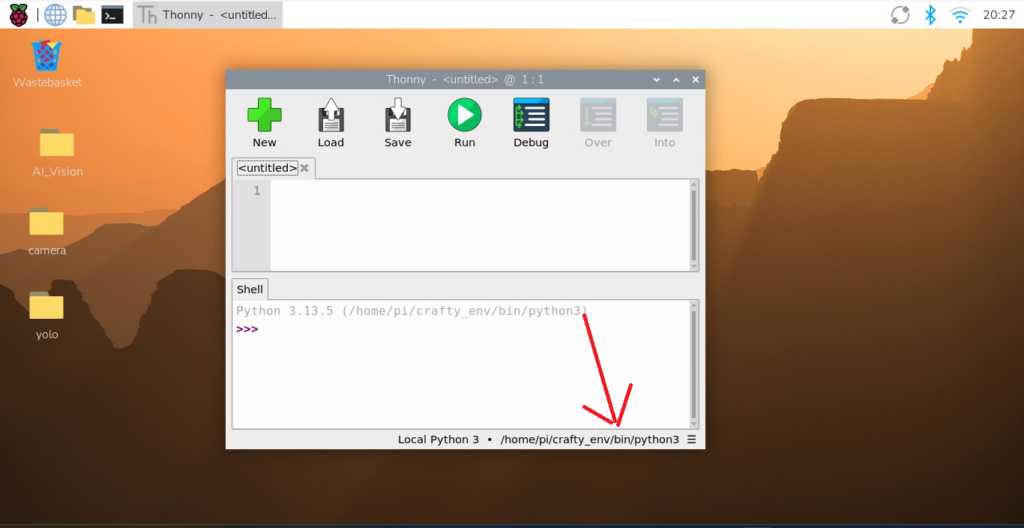
You should see the path to the virtual environment and the interpreter (python3) in the lower-left corner of the Thonny window. If not, follow the CraftyRobotics tutorial on virtual environments. https://craftyrobotics.com/setting-up-a-python-virtual-environment/
/home/pi/crafty_env/python3Step 4 — Create the YOLO Program
The 3-Line Live Tracking Pipeline
This streamlined snippet uses the built-in Predict Streaming Mode to open a USB webcam, process the live video feed frame-by-frame, and automatically display an interactive window with drawn bounding boxes—all with just two lines of working code.
python

from ultralytics import YOLO

# 1. Load the YOLO PyTorch model file and specify the task
model = YOLO("yolov8n.pt", task="detect")

# 2. Run the streamlined streaming mode directly on the USB camera
results = model.predict(source=0, show=True)
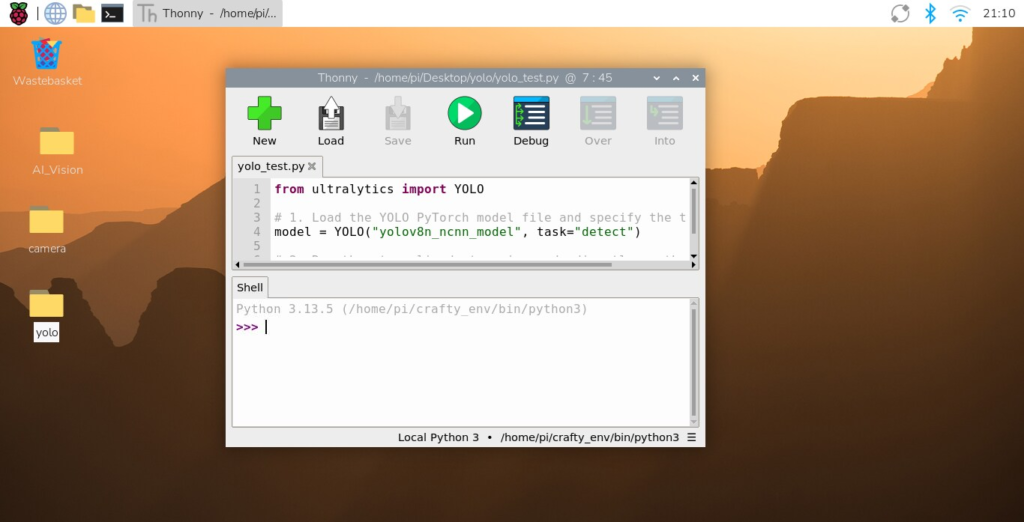
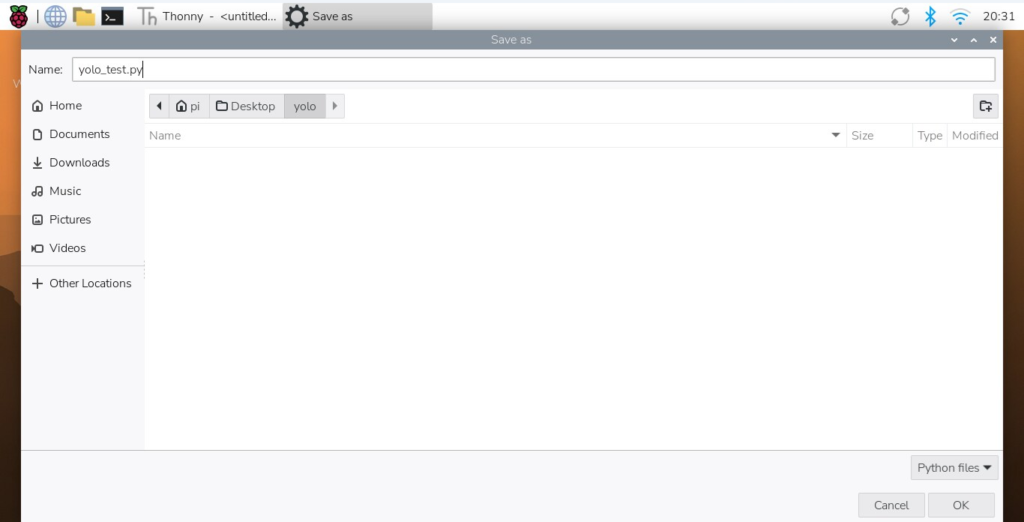
Copy the script above, and paste it directly into Thonny’s upper text window. Click the Save button in the top toolbar, name your file yolo_test.py, and save it inside your yolo folder on the Desktop so it sits right next to your model.
Step 5 — Run the Program
Once saved, click the green Run button in the Thonny toolbar.
Note on the First Launch: Because you are using yolov8n.pt, your Raspberry Pi will automatically download the model file from the internet during this first run. This only happens once!
After the download finishes, watch your screen:
- The webcam turns on automatically.
- objects are detected.
- Colored bounding boxes and labels appear over the video feed in real time.
To stop the program running click on the image and click “q”.
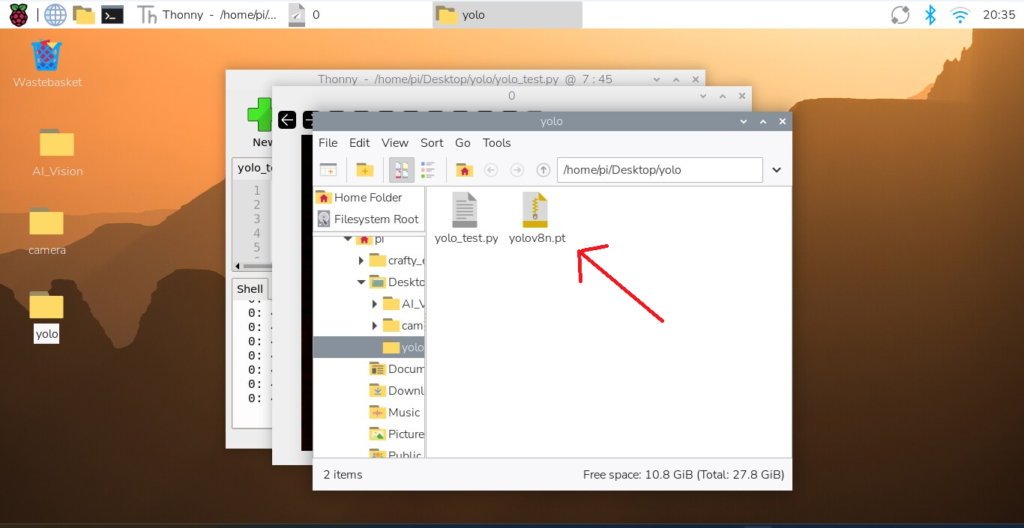
The important thing? We now have a working copy of the yolov8n PyTorch model running on our Raspberry Pi 5! But standard PyTorch models can be heavy and run slowly on microcomputers. We will now supercharge it by converting this yolov8n.pt file into the lightning-fast NCNN format.
Step 6 — Convert the model to NCNN
Open your Terminal window. We are using the terminal instead of Thonny for this step for one very important reason: RAM and CPU power.
Converting the yolov8n model structure requires a massive amount of background processing. Thonny is a wonderful, lightweight code editor, but running heavy model compilation inside its interface can cause it to freeze up or crash entirely on a microcomputer. Using the raw terminal ensures your Raspberry Pi 5 puts 100% of its processing power toward the conversion without any lag.
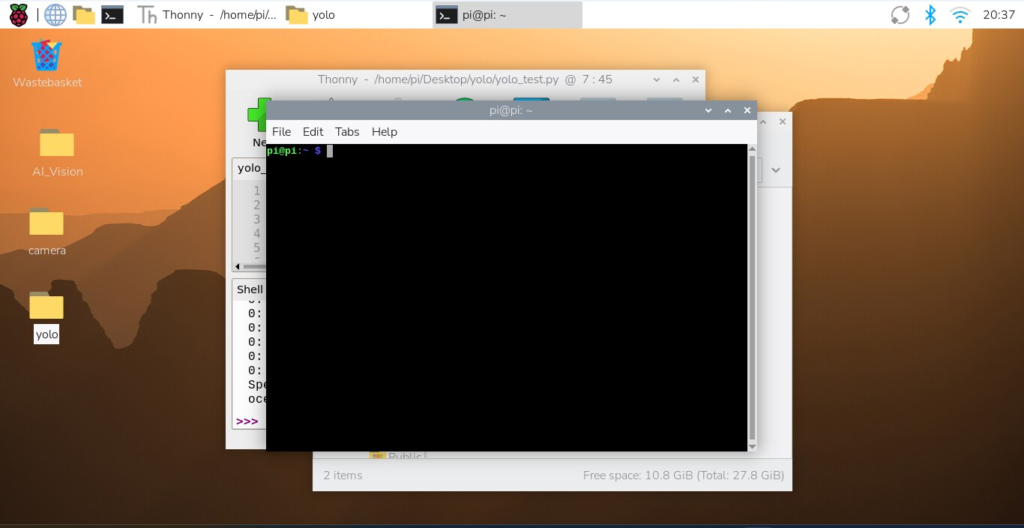
Activate Your Virtual Environment
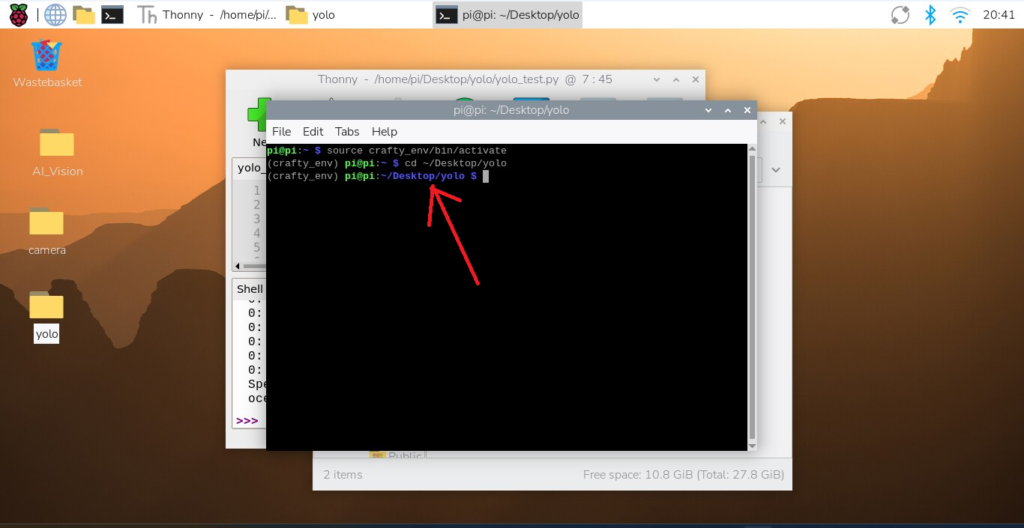
Before running the conversion, we need to activate our specific workspace. We are using the exact Virtual Environment that we created in our previous CraftyRobotics tutorial on virtual environments.
Enter the following command in your terminal to activate it:
bash

source crafty_env/bin/activate
With the virtual environment successfully open, you need to navigate into the specific folder containing our PyTorch model.
Enter this command in your terminal to switch to the yolo directory on your Desktop:
bash

cd ~/Desktop/yolo
Once inside, your terminal prompt will change to show you are in the correct spot, right alongside your yolo file containing the yolov8n.pt model.
Exporting to NCNN
Now that you are inside your folder with the environment active, it is time to run the conversion command.
Type this single line into your terminal and press Enter:
bash

yolo export model=yolov8n.pt format=ncnn imgsz=640
What to Look For:
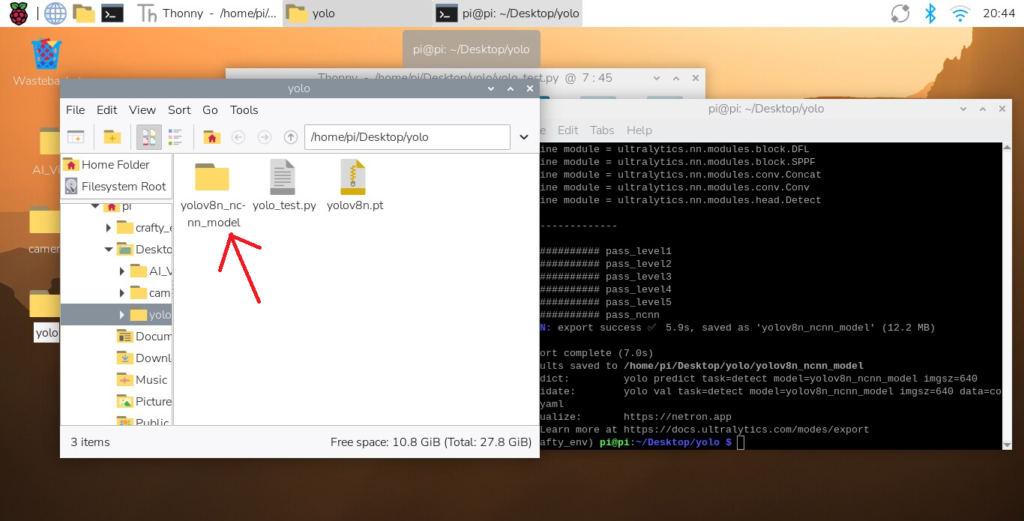
Once the process finishes, look inside your yolo folder on the Desktop. You will see a brand-new folder automatically created named yolov8n_ncnn_model/.
Inside this new folder are the highly optimized weight files that your Raspberry Pi 5 can read at lightning speed.
Step 7 — Run in Thonny
Run the Supercharged Model in Thonny
Head back over to Thonny and look at your yolo_test.py script. Thanks to the way the framework is designed, you only need to change one single line of code to experience the speed boost.
Swap out your old model line for the new NCNN folder path:
Change this old line:
change this:

python

model = YOLO("yolov8n.pt", task="detect")

to

python

model = YOLO("yolov8n_ncnn_model", task="detect")
Save your script and click the green Run button. Your USB camera will instantly open up, but this time, the object detection will run significantly smoother and faster on your Raspberry Pi 5!
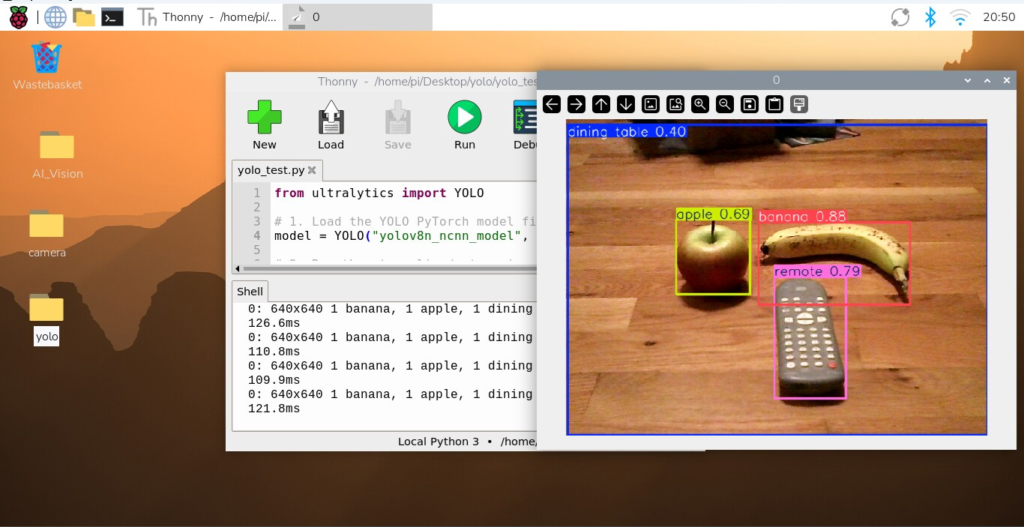
Congratulations! You just took a heavy PyTorch model and completely optimized it for the edge. By switching to Tencent’s NCNN framework, your Raspberry Pi 5 can now process real-time vision tracking without breaking a sweat or freezing your IDE.