
Build a motion detection system that automatically saves images and timestamps using Python and OpenCV.
In this tutorial, you’ll build a motion detection system using a Raspberry Pi, Python, and OpenCV. The system detects movement in real time, saves snapshots automatically, and adds timestamps to each image. This is a simple but powerful project that can be expanded into a full security or AI-based system.
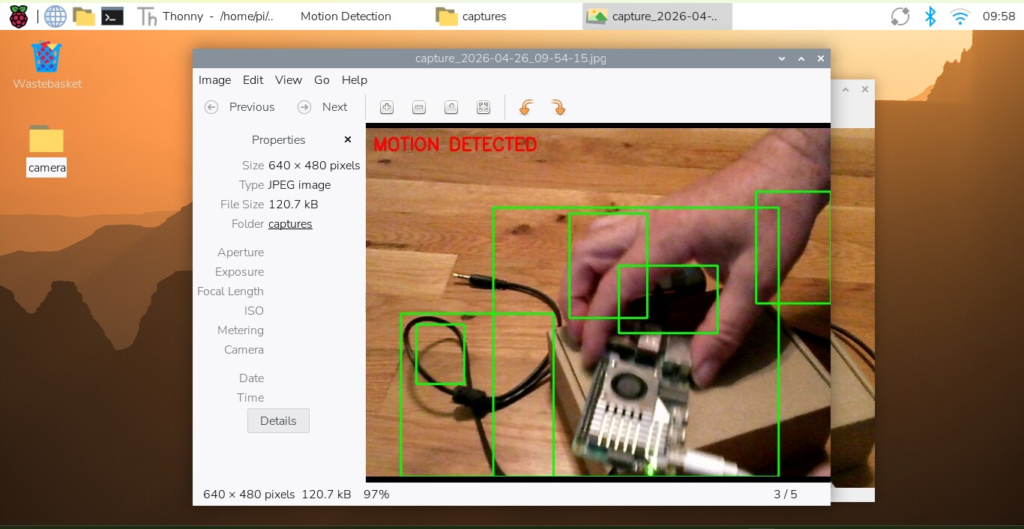
WHAT YOU’LL BUILD
In this tutorial, you’ll create a motion detection system that:
- Detects movement in real time
- Saves snapshots automatically
- Adds timestamps to each image
WHAT YOU NEED
- Raspberry Pi 3,4 or 5.
- USB Camera
- Python 3
- OpenCV
Before starting, make sure OpenCV is installed and a Python virtual environment is set up. If not, check out the CraftyRobotics virtual environment tutorial.
Step 1: Open Thonny
- Plug a USB camera into one of the Raspberry PI USB ports.
- Power on your Raspberry Pi.
- Open Thonny IDE.
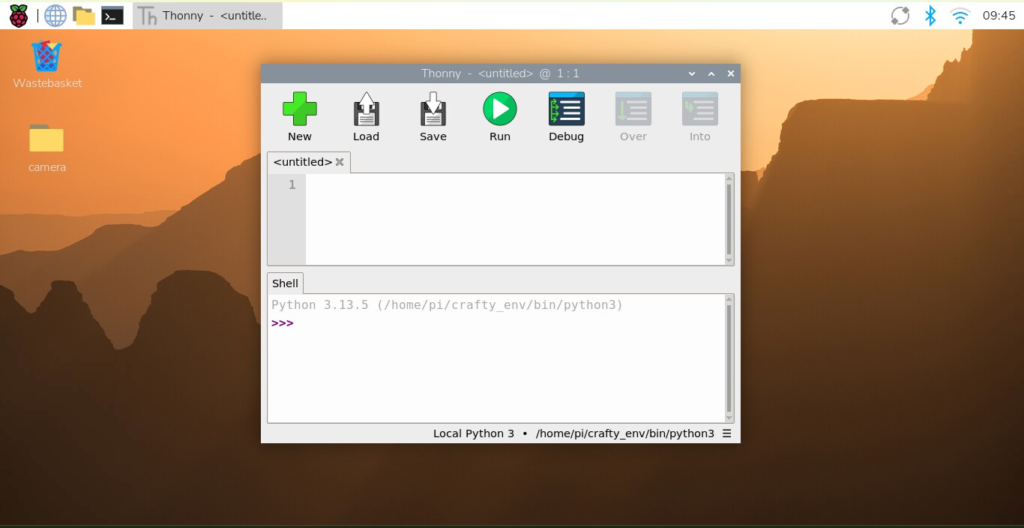
Step 2: Create Your Script
Click New File and navigate to the camera folder on the desktop.
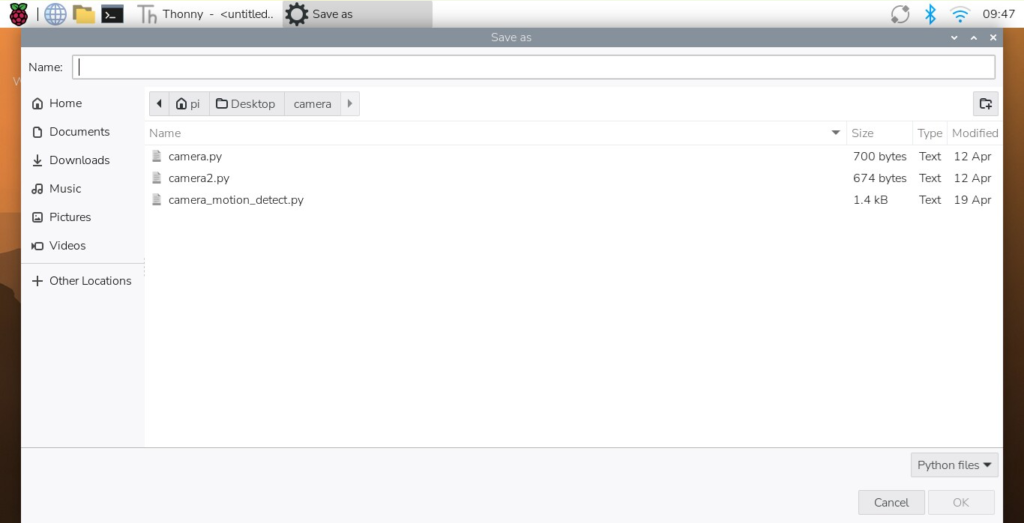
Name the new file motion_capture.py and click ok.
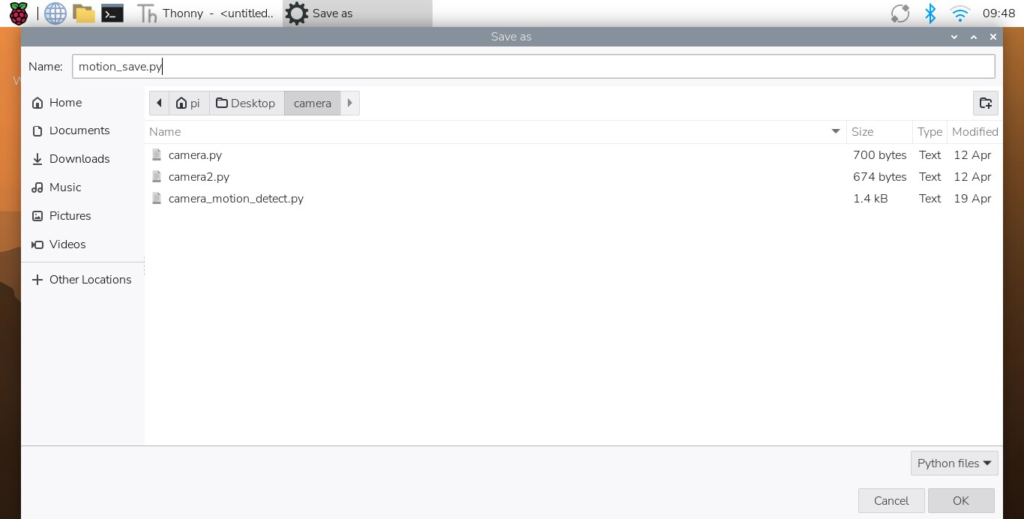
Copy the code below. A full explanation of how it works is provided at the end of this tutorial.
import cv2
import time
from datetime import datetime
import os

os.makedirs("captures", exist_ok=True)

cap = cv2.VideoCapture(0)

ret, frame1 = cap.read()
ret, frame2 = cap.read()

last_capture = 0

while cap.isOpened():

    diff = cv2.absdiff(frame1, frame2)
    gray = cv2.cvtColor(diff, cv2.COLOR_BGR2GRAY)
    blur = cv2.GaussianBlur(gray, (5,5), 0)
    _, thresh = cv2.threshold(blur, 20, 255, cv2.THRESH_BINARY)
    dilated = cv2.dilate(thresh, None, iterations=3)

    contours, _ = cv2.findContours(dilated, cv2.RETR_TREE, cv2.CHAIN_APPROX_SIMPLE)

    motion = False

    for contour in contours:
        if cv2.contourArea(contour) < 2000:
            continue
        motion = True

        x, y, w, h = cv2.boundingRect(contour)
        cv2.rectangle(frame1, (x, y), (x+w, y+h), (0,255,0), 2)

    if motion:
        cv2.putText(frame1, "MOTION DETECTED", (10, 30),
                    cv2.FONT_HERSHEY_SIMPLEX, 0.8, (0,0,255), 2)

        if time.time() - last_capture > 2:
            now = datetime.now().strftime("%Y-%m-%d_%H-%M-%S")
            filename = f"captures/capture_{now}.jpg"
            cv2.imwrite(filename, frame1)
            print("Saved:", filename)
            last_capture = time.time()

    cv2.imshow("Motion Detection", frame1)

    frame1 = frame2
    ret, frame2 = cap.read()

    key = cv2.waitKey(1)
    if key == 27:  # ESC to exit
        break

cap.release()
cv2.destroyAllWindows()
Step 3: Paste the Code
Paste the code into the upper window in Thonny, then click Save.
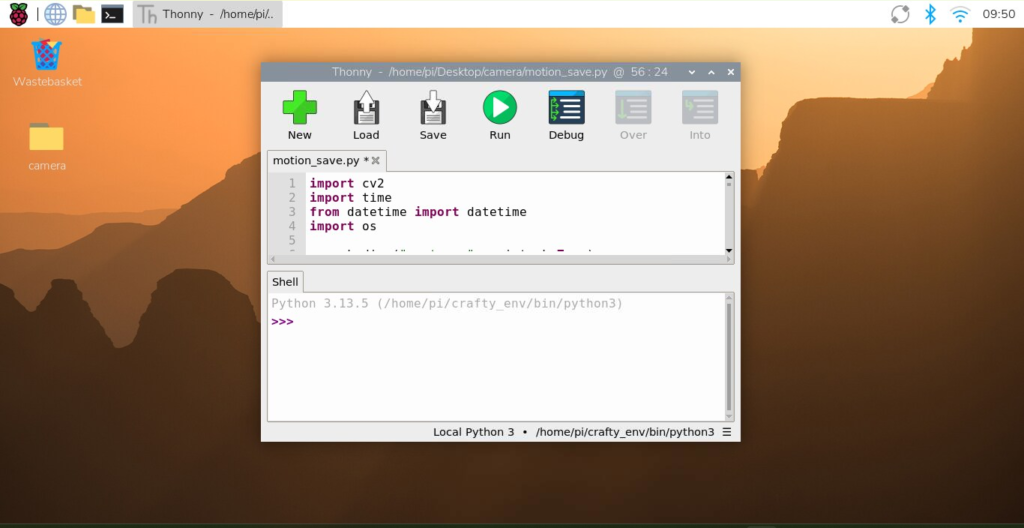
Step 4: Run the program.
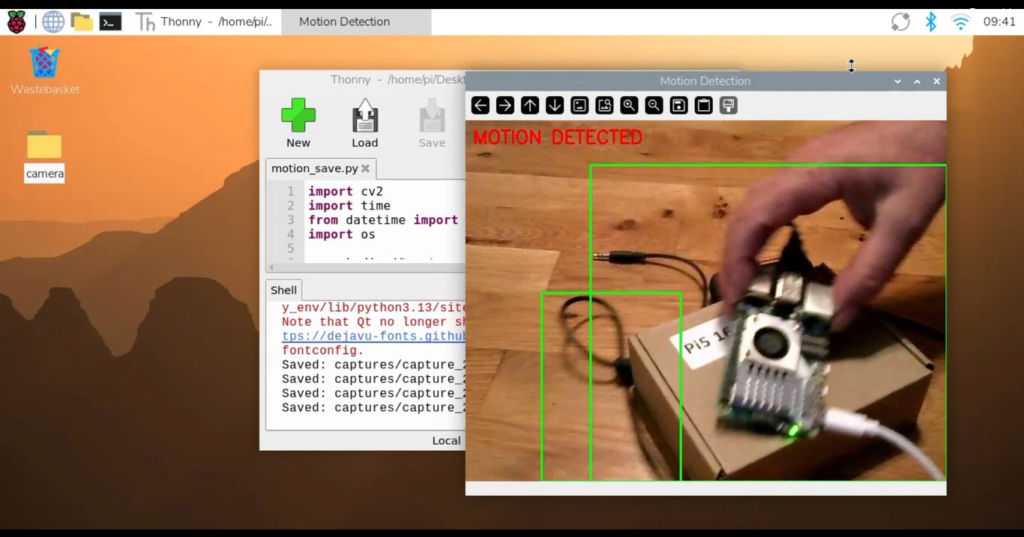
- Click Run (a new window will appear with an image from the camera).
- Move your hand in front of the camera.
- You’ll see images saved with timestamps.
- You may also see a warning in the lower window of Thonny. This is related to how OpenCV displays images in a virtual environment and can be safely ignored for now.
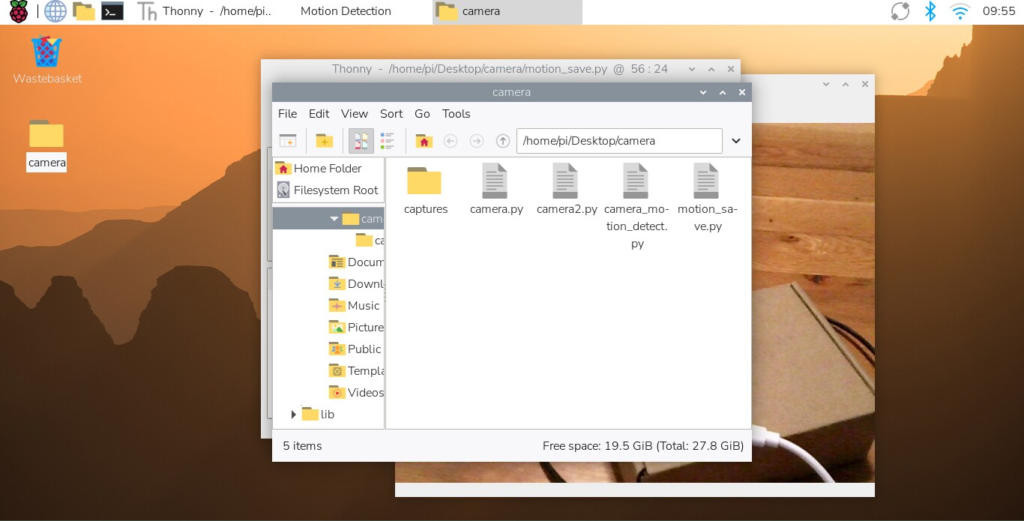
WHERE IMAGES ARE SAVED
Open the camera folder.
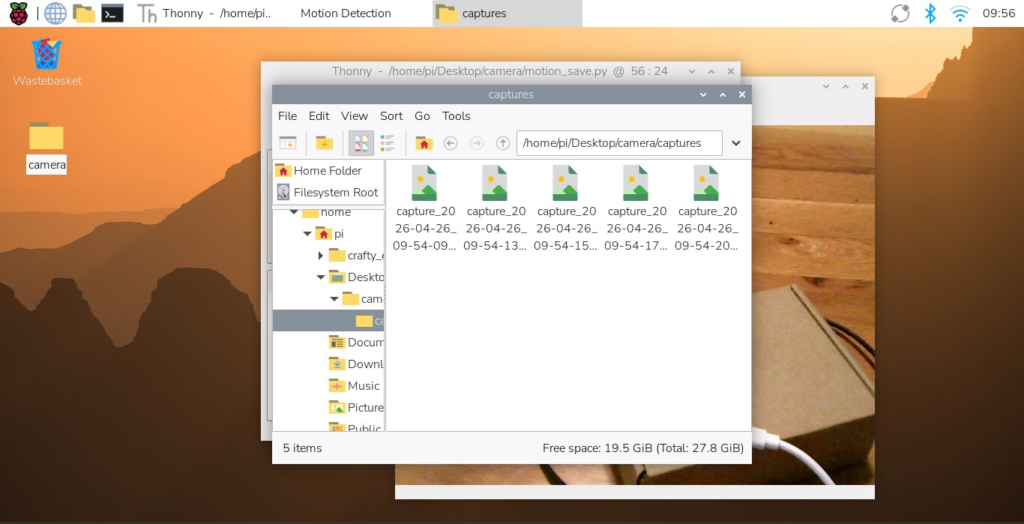
Go to the captures folder.
You’ll see images saved with timestamps.
The Code
This program uses Python and OpenCV to detect motion from a camera feed and automatically save images when movement is detected.
Importing Libraries
import cv2
import time
from datetime import datetime
import oscv2– Handles video capture and image processing.time– Used to control how often images are saved.datetime– Adds timestamps to filenames.os– Creates folders to store images
Create a Folder for Images
os.makedirs("captures", exist_ok=True)This creates a folder named captures where all motion images will be saved.
If the folder already exists, nothing happens.
Start the Camera
cap = cv2.VideoCapture(0)This connects to your camera (usually a USB webcam).
Capture Initial Frames
ret, frame1 = cap.read()
ret, frame2 = cap.read()
The program grabs two frames from the camera.
These are used to compare changes between frames (this is how motion is detected).
Set Capture Timer
last_capture = 0This keeps track of the last time an image was saved so the program doesn’t save too many images too quickly.
Main Loop (Runs Continuously)
while cap.isOpened():This loop keeps the camera running and constantly checks for motion.
Detect Motion
diff = cv2.absdiff(frame1, frame2)
gray = cv2.cvtColor(diff, cv2.COLOR_BGR2GRAY)
blur = cv2.GaussianBlur(gray, (5,5), 0)
_, thresh = cv2.threshold(blur, 20, 255, cv2.THRESH_BINARY)
dilated = cv2.dilate(thresh, None, iterations=3)- Frame difference → finds what changed between frames.
- Grayscale → simplifies the image.
- Blur → reduces noise.
- Threshold → turns image into black & white.
- Dilation → makes motion areas bigger and easier to detect.
Find Motion Areas
contours, _ = cv2.findContours(dilated, cv2.RETR_TREE, cv2.CHAIN_APPROX_SIMPLE)Contours are shapes that represent areas of motion.
Filter Small Movements
motion = False

for contour in contours:
    if cv2.contourArea(contour) < 2000:
        continue
Small movements (like noise or flicker) are ignored.
Only larger movements trigger detection.
Draw Detection Box
motion = True
x, y, w, h = cv2.boundingRect(contour)
cv2.rectangle(frame1, (x, y), (x+w, y+h), (0,255,0), 2)
If motion is detected:
- A rectangle is drawn around the moving object.
- This makes it visible on screen
Display Motion Alert
cv2.putText(frame1, "MOTION DETECTED", (10, 30),
            cv2.FONT_HERSHEY_SIMPLEX, 0.8, (0,0,255), 2)
Adds a red “MOTION DETECTED” label to the video feed.
Save Snapshot with Timestamp
if time.time() - last_capture > 2:
    now = datetime.now().strftime("%Y-%m-%d_%H-%M-%S")
    filename = f"captures/capture_{now}.jpg"
cv2.imwrite(filename, frame1)- Saves an image when motion is detected.
- Adds a timestamp to the filename.
- Waits 2 seconds between captures to avoid duplicates.
Example filename:
capture_2026-04-28_14-32-08.jpgShow Live Video
cv2.imshow("Motion Detection", frame1)Displays the video feed with motion detection overlays.
Update Frames
frame1 = frame2
ret, frame2 = cap.read()
Moves to the next frame so motion can continue to be detected.
Exit the Program
key = cv2.waitKey(1)
if key == 27:
    break
Press ESC to stop the program.
Clean Up
cap.release()
cv2.destroyAllWindows()
Closes the camera and any open windows.
Summary
- Detects motion using frame comparison.
- Highlights movement with a box.
- Displays a live video feed.
- Saves timestamped images automatically.
WHAT’S NEXT
Next Tutorial Coming:
- Detect what the object is using AI (YOLO).
- Turn this into a smart security camera.
Check out the full build on YouTube:
CraftyRobotics